
If your kitchen cabinets are dated, ugly, stained, or just not the right color – then you’ve come to the right place. We’ve got you covered with these easy kitchen cabinet painting steps to make your kitchen look brand new – the simple and fast way.

It’s often said that the kitchen is the heart of the home.
If you’re like me, my kitchen is the place for family gatherings, food, joy, and togetherness.
And, if your kitchen doesn’t have the right vibe or style, then it’s time to upgrade.
One of the first things my husband and I did after we purchased our 1960s fixer-upper home was to upgrade the kitchen on a budget.
After our moving expenses, we didn’t have the ability to hire a contractor for a full-fledged kitchen upgrade project.
Upon researching inexpensive ways to brighten and renovate a kitchen on a budget, the cabinets were first on our DIY kitchen upgrade project list.
After finishing my own kitchen cabinet painting project, I’m excited to share with you how to upgrade your own home as well.
So, grab a cup of coffee, settle in, and get started on how to start your own kitchen cabinet painting upgrade project today.
I may earn a small commission for affiliate links in this post at no extra cost to you. Please read my privacy policy and privacy page for more information. As an Amazon Associate, I earn from qualifying purchases.
1. Select the Kitchen Cabinet Paint Color
There are so many color choices to brighten a kitchen or darken it depending on the goals of the homeowner.
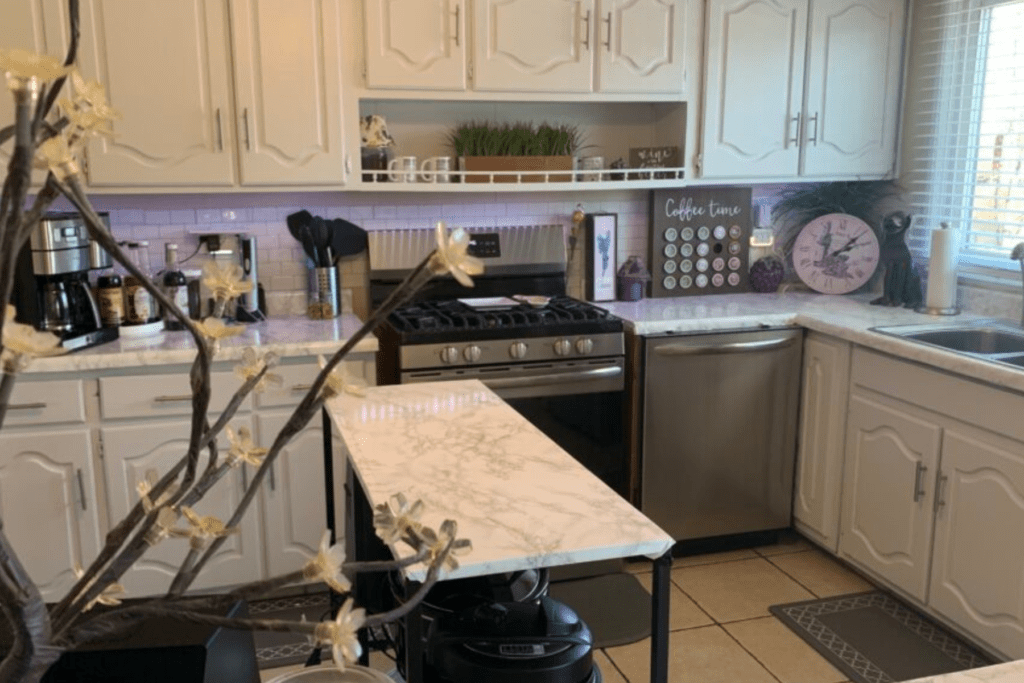
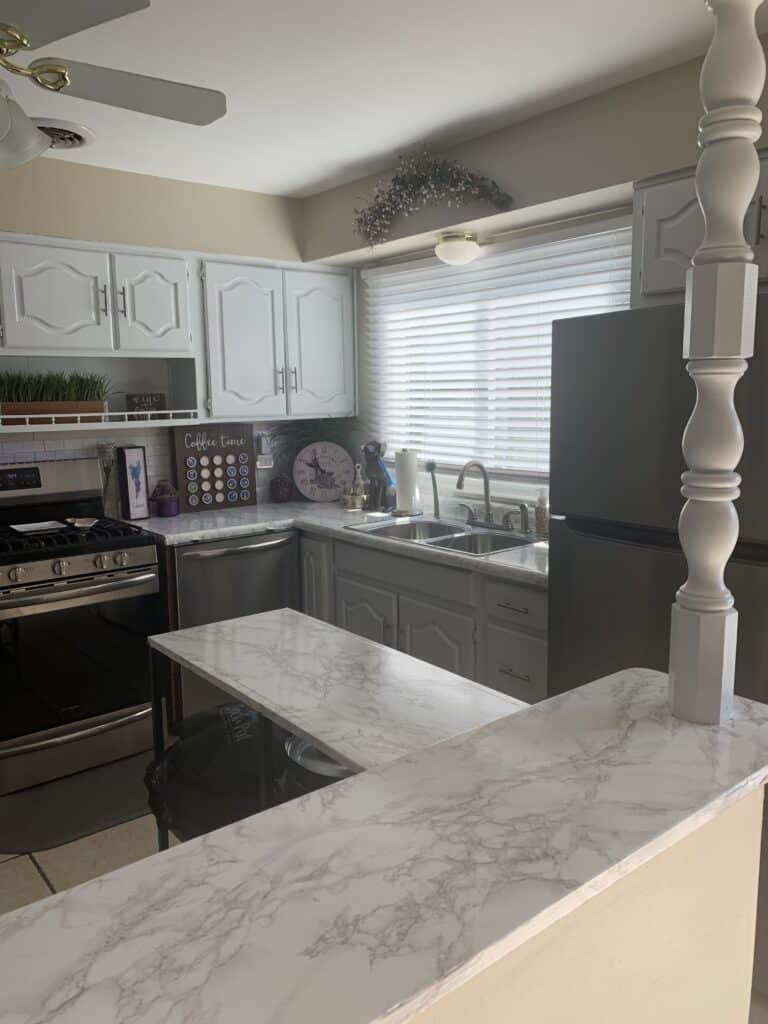
When we purchased our home, the kitchen cabinets were a 1960s dark walnut wood that made the room look small and drab.
I wanted to brighten the kitchen and dreamed of bright white kitchen cabinets to make the kitchen look bigger and brighter.
Popular kitchen cabinet paint choices include:
- Driftwood (light grey)
- Celadon (greenish blue)
- Cocoa (bronze-ish/brown)
- Navy Blue (darker blue)
- Titanium (white)
2. Choose the Right Type of Kitchen Cabinet Paint
There are several types of paint available but only certain ones are advised for kitchen cabinets.
Paint types:
- Gloss
- Semi-gloss
- Satin
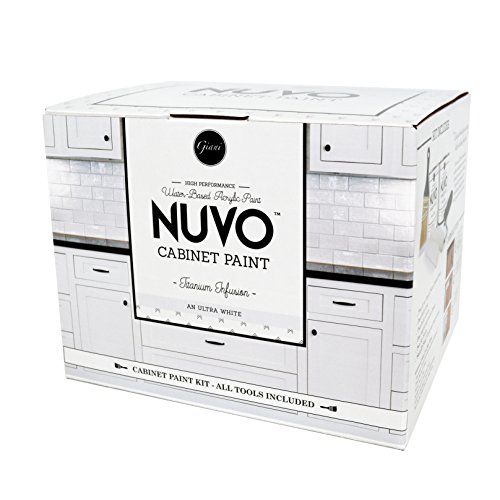
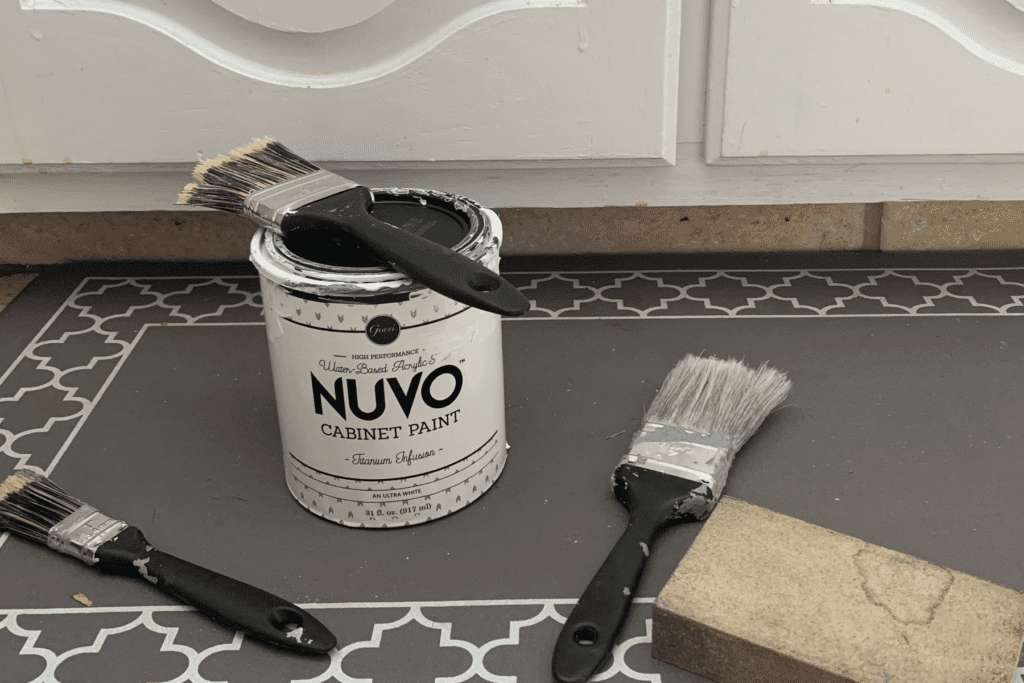
Since my husband and I were complete newbies when it came to painting kitchen cabinets, I ordered an all-in-one kit by Nuvo in the platinum (white) color.
The Nuvo Kitchen Cabinet Painting Kit made our lives easy since it had almost everything we needed.
I love the Nuvo Kitchen Cabinet Paint so much that I also repainted my kitchen table and chair legs to match the newly painted kitchen cabinets.
You can see the before and after of my kitchen table upgrade with the Nuvo paint kit.
The Nuvo Cabinet Painting Kit includes :
- Water-based acrylic paint
- Heavily pigmented for smooth, and even coverage, without drips or streaks
- Covers 100 square feet of cabinets (40 linear feet) – the typical size of most kitchen cabinets
- Optimized for easy brush and roll-on application (all necessary tools are included in the kit)
- Dries with a satin finish without the need for an additional protective topcoat
- Specifically formulated for durability on high traffic surfaces
- Perfect for kitchen cabinets
- Crafted with a high level of environmental standards
- Ideal for use on wood, laminate, MDF, and particle board cabinets, and primed or painted metal cabinets.
3. Check Off Your Supply List for Kitchen Cabinet Painting
To make sure we had everything we needed I made a supply list.
Although the kitchen cabinet painting kit contained many of the necessary supplies, we purchased a few additional items to make the process easier.
Kitchen cabinet painting supply list:
- Nuvo kitchen cabinet painting kit in titanium
- Drop cloths (for the floor)
- Windex (for degreasing)
- Paper towels
- Handheld sanding block (two one for each of us)
- Sandpaper
- Tiny brushes (three different sizes)
- Painter’s tape
- Clear tape
- Paint mixing tool
Step 4: Clean Out Kitchen Cabinets and Cupboards
Although it’s not completely necessary to empty the contents of the cabinets, it’s advised.
Even the most careful painter can occasionally slip up and paint a wrong area or spill.
To be on the safe side, removing all contents will ensure nothing gets damaged in the kitchen cabinet painting process.
In addition, the cabinets could potentially be out of use for a couple of days, so having access to cabinet contents could be needed during that time frame.
5. Apply Drop Cloths or Painters’ Plastic to Kitchen Floors, Appliances, Counters, and Backsplash
Make sure to protect your kitchen.
Although I did my best to be extra careful, I did spill and dribble paint on the countertops, floors, backsplash, and appliances.

10 Pieces Plastic Drop Sheets for Painting, Waterproof and Dust-Proof Clear Cloth for Furniture Cover, 9x12 Feet Tarps
Thank goodness I laid out clear painter’s plastic across the floors, countertops, backsplash, and appliances to protect everything from wayward paint.
I did add some clear tape to make sure the painter’s plastic didn’t move around during the kitchen cabinet painting process.
6. Use Painter’s Tape to Tape Off Non-Painted Kitchen Areas
Be sure to apply a good painter’s tape (I used Frog Tape) to protect areas of the walls that aren’t being painted.
I accidentally skimped on this step at first and got some paint above the cabinets and down the sides of them on the wall itself.

FROGTAPE Multi-Surface Painter’s Tape with PAINTBLOCK, Medium Adhesion, 1.88 Inches x 60 Yards, Green, 3 Rolls (240661)
(Thankfully, we were able to find touch-up paint from the previous owners.)
Don’t make the mistake I did, make sure to tape off any area of the kitchen walls that you don’t want to accidentally apply the kitchen cabinet paint.
7. Remove Kitchen Cabinet Hinges and Pulls

Moving along with the kitchen cabinet painting prep work, remove all hardware with a toolkit to take off kitchen cabinet pulls.
Pro tip: Create a designated box to keep all screws, pulls, knobs, and hinges in one area. Use clear tape to secure screws to the individual pulls or hinges.
8. Degrease Kitchen Cabinets with Windex
As part of the prep work for kitchen cabinet painting, make sure to properly degrease the cabinets.
Degreasing the cabinets is an imperative step.

Daley Mint Towel + Windex Glass and Window Cleaner Bundle | Windex Original No Scent Spray Bottle, 23oz + Windex Refill, 67.6oz | Home Window & Glass Cleaners Kit (90.6oz Total)
If you were to apply kitchen cabinet paint overtop of grease, the paint would not properly adhere to the surface creating chips, cracks, and peeling.
When I degreased, I used Windex and a paper towel. I carefully went over all sides and surfaces of the kitchen cabinets with the degreaser and paper towels.
9. Begin Sanding Kitchen Cabinets
Probably the absolute most important step in kitchen cabinet painting is sanding.
Now I know there are some kitchen cabinet painting kits out there that boast “no sanding necessary.”

I checked and saw that the Nuvo Kitchen Cabinet Painting Kit did suggest light sanding.
I was good with this as I figured the paint would adhere better since my cabinets were from the 1960s.

In general, paint has a difficult time adhering to smooth and shiny surfaces as well as older woods.
I used a few different grit sandpaper types as well as a sanding block.
Use 100 or 150- grit sandpaper to start then go over the area again at the end with 220-grit sandpaper.

The sanding block was great for the middle of the cabinets as it didn’t tire my arms and hands out as much as the sandpaper.
10. Degrease Kitchen Cabinets Again
After sanding, degreasing again is imperative.
The second round of degreasing with Windex and paper towels removes all the sanding residue as well as any dirt and grime that was unearthed.
If you paint before degreasing again the paint will not adhere to the cabinets.
11. Open the Paint Can and Mix Paint

The next thing to prep before kitchen cabinet painting is getting the paint ready.
Open the can of paint using:
To remove the lid off the paint gently pry the edging with one of the tools above.
Slip the edge of the tool (whichever one is chosen) under the lip and lift upward (slowly) then move to another area and lift again until the lid eventually pops off.

Pro tip: Be careful when the lid pops off as there could be some paint on it.
Once the paint can is opened, now is the time to mix it. Mixing the paint is important as paint components, can and often do, separate.
To prepare the paint, gently use a paint mixing tool (such as a wooden stick) to churn the paint.
12. Layout Kitchen Cabinet Paint Brushes and Rollers
The final prep step of kitchen cabinet painting is to assemble the painting tools.
I added a drop cloth to a counter and created a staging area for all my supplies.
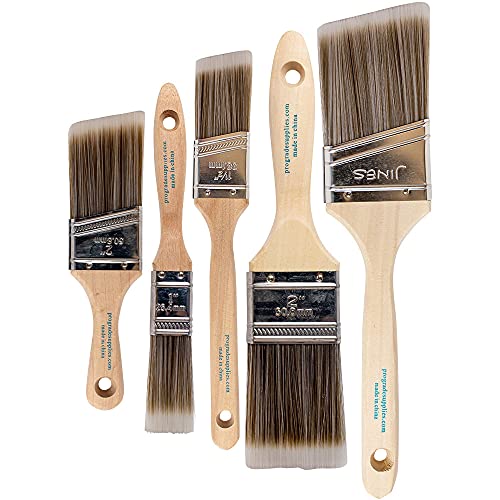
I laid out all my brushes as well as the rollers in order of size.
By organizing my paintbrushes, I could easily switch from one brush to another quickly while painting.
Pro tip: Make sure to have a drop cloth where the paint brushes will lay to make sure paint doesn’t drip or spill on the kitchen cabinet painting staging area.
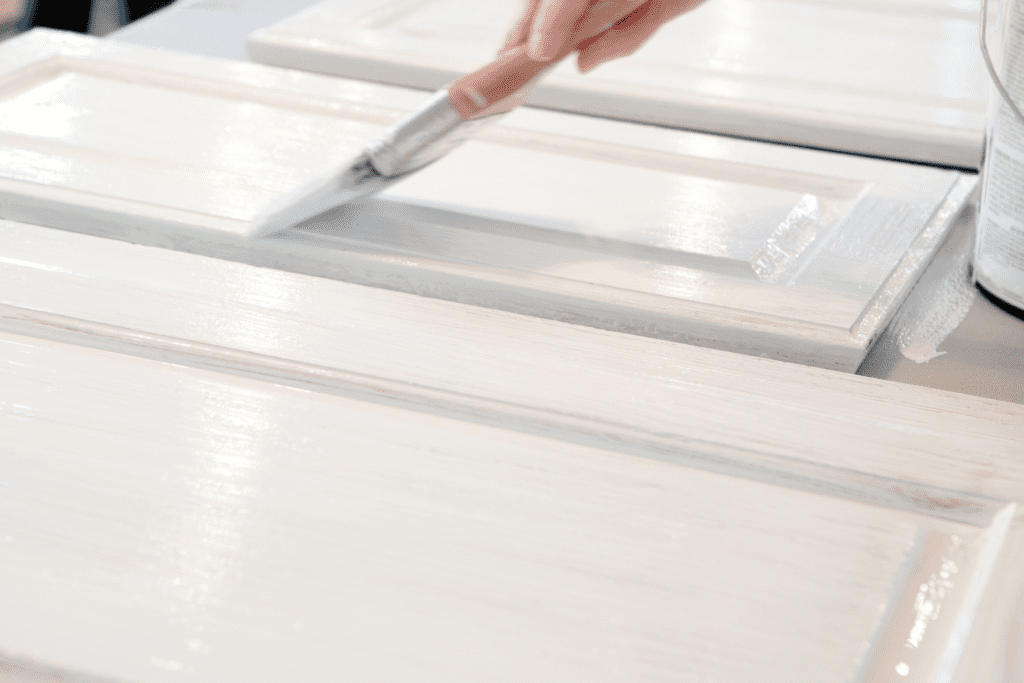
13. Begin Painting Kitchen Cabinets
Let the fun kitchen cabinet painting project officially begin!
The time-consuming prep work is now complete and it’s time for the fun part – painting the kitchen cabinets.
There are lots of ways to apply paint to the kitchen cabinets such as using a paint roller or a paintbrush.
Although a paint roller can apply paint more quickly, I didn’t like the textured look that it produced.
I used brushes for the entire kitchen cabinet painting process to have a cohesive and fluid look.
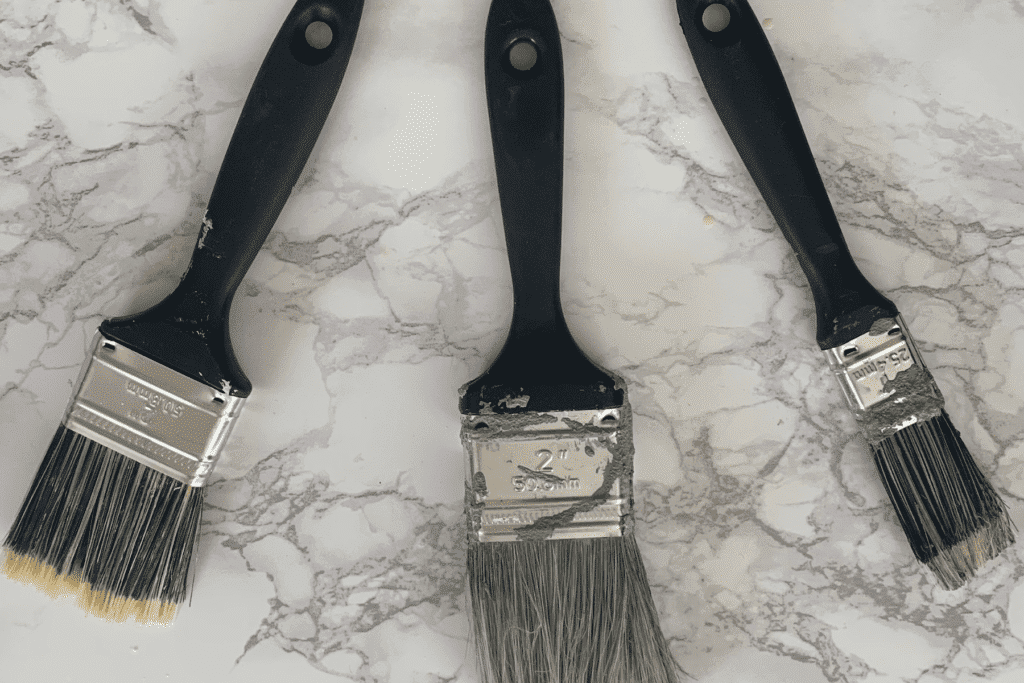
14. Try Different Paint Brush Sizes
Depending on the style of the kitchen cabinet, different brush sizes may be necessary.
I purchased a few different size brushes but found I primarily used a thick brush and a thin, fine-tip brush.
- Thick brush: I used a thick brush for the middle and edges of my kitchen cabinets.
- Thin brush: My cabinets had a recessed area around the middle and edging that required a fine-tip brush to apply the paint. Using the thin brush, I was able to really get in the grooves to adhere to the paint properly.
Pro tip: Be very careful to avoid paint drips. These are where too much paint was applied to the kitchen cabinet and the paint starts running down the cabinet door. To avoid this, carefully add paint to the brush in small batches.
Step 15: Don’t Worry About the First Coat Being Thin
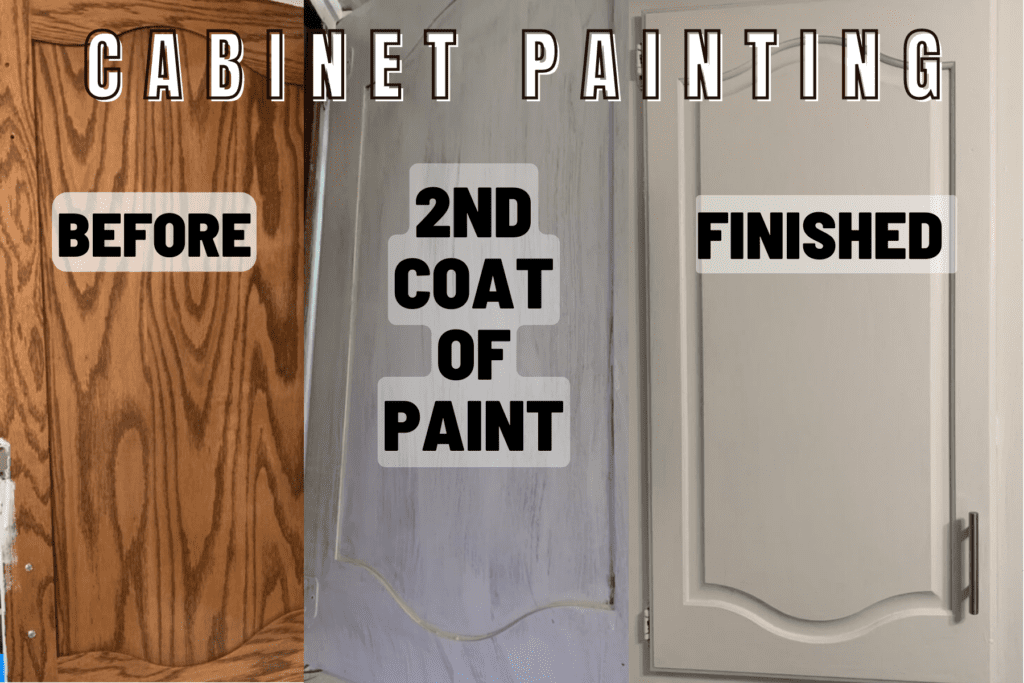
Since my kitchen is on the smaller side, I don’t have a ton of cabinets.
The first coat took me a little over an hour to apply. I will say, I started to second-guess myself after I completed the first coat.
I was so sure that I ruined my cabinets and made an irreversible mistake painting the kitchen cabinets.
My advice – don’t worry! Seriously, this is important.
Do not get upset that the kitchen cabinets are not looking good yet.
It will be ok! I wish someone had told me about this right around step 15!
16. Apply a Second Coat of Paint to the Kitchen Cabinets
After allowing ample drying time, it’s now time to apply a second coat of paint to the kitchen cabinets.
Try to apply the same brush strokes and similar painting style as the first coat.
Basically, if the paint strokes were up and down on the first coat, do that again.
This will allow the cabinets to maintain a cohesive look.
17. Apply a Third Coat of Paint to the Kitchen Cabinets
Here we go again – more painting of the kitchen cabinets! Basically, we’re just repeating step 16.
Make sure you allow ample drying time after the second coat and maintain consistency with brush strokes and the overall kitchen cabinet paint application.
18. Reattach Hardware after Kitchen Cabinet Painting
After the third coat is fully dry, it’s time to reattach the hardware.
Grab that box of all the hardware and sort it out to make sure the proper pulls and hinges go with the right cabinets.
Due to the age and quality, we decided to scrap the existing cabinet pulls and upgrade to new ones.
This made life so much easier as we were able to scrap the old pulls and have brand-new ones ready to go.

Final Thoughts
After finishing up my kitchen cabinet repainting project, I couldn’t be more thrilled with the results.
The transformation is stunning, and it truly feels like a brand-new kitchen.
This budget-friendly DIY project not only saved me a significant amount of money but also gave me the satisfaction of doing it myself.
If you’re considering a change in your kitchen, I highly encourage you to take the plunge and try repainting your cabinets.
The sense of accomplishment and the beautiful outcome make it absolutely worth the effort!
Are you searching for some great free printable wall art ideas for your kitchen? Check out this free botanical wall art below and we’ll send it directly to your email!
Want more great DIY and everything home ideas? Be sure to follow us on Flipboard, Pinterest, Instagram, Facebook, and Twitter for the latest posts, tips, and ideas.
Your Turn
What color of kitchen cabinet paint do you think is best? Are you planning a kitchen cabinet painting project soon? Let me know in the comments!
RELATED POSTS:
- 14 Easy Steps to DIY Cheap Countertop Upgrade
- Cheap and Easy Kitchen Updates On a Budget That Make a Big Difference for Less
- How to Install a Kitchen Peel and Stick Backsplash on a Budget
- Easy DIY Budget Kitchen Remodel Ideas to Makeover for Less
- DIY Repaint Kitchen Table and Chairs the Easy Way
- 20 Kitchen Decorating Theme Ideas for Every Home


Very detailed instructions! I’ve bookmarked this page for when I get round to doing this in the future.
Hi Liv! Thank you for reading! It’s amazing what a little paint on kitchen cabinets will do. I hope you can paint yours in the future.
Saving this for later when I eventually get around to painting!
I was extremely pleased to uncover this page. I want to to thank you for your time due to this wonderful read!! I definitely savored every little bit of it and i also have you book marked to look at new things in your site.
I’m glad you found the post helpful. Thank you for reading.
Wow who knew there were so many important steps! Thank you thank you thank you for putting together a guide to walk me through it.
Hi Catia!
You are very welcome! There are definitely a few important steps to make sure kitchen cabinet painting works perfectly.
Thank you for reading!
You may have inspired me to redo my kitchen!
Hello Kate!
I’m so excited to have inspired a kitchen redo! The kitchen cabinet painting process makes such an impact on the space!
Thank you for reading!
Thank you for this post! We just had our kitchen cabinets painted by someone. I wanted to do it myself but was so scared I would mess them up. The bathroom cabinets still need to be done so your detailed post will be a huge help! Even down to the different grits of sandblocks! Definitely saving this for future reference!
Hi Michelle!
I’m so glad you found the kitchen cabinet painting post helpful. I hope your bathroom cabinets come out great!
Thank you for reading!
I seem to often come across the articles on this site at just the right time! I have a 20-year old bathroom cabinet that has not been treated well. Had thought about replacing it but you have given me the confidence I can do it myself!
Hi Stephanie!
I’m so glad you found the article at the right time, too. I hope your bathroom cabinet painting project is a success.
Thank you for reading!
This post makes it sound very simple to those of us scared of DIY lol. It’s amazing what a fresh coat of paint can do!
Hi Katherine!
I used to be totally scared of DIY projects – but, one day just said – I’m trying. It really makes such a huge change with a fresh coat of paint.
Thank you for reading
So many great tips and super helpful instructions! Thank you so much for posting this!
Hi Anita!
You are very welcome. I’m so glad you found the kitchen cabinet painting post helpful!
Thank you for reading!
I love DIY and doing things at home like this. We might not change it any time soon, but will keep this in mind just in case. Thank you for sharing!
Hi Fransic!
I love home DIY projects like kitchen cabinet painting, too. Always fun to change things up.
Thanks for reading!
Wow these turned out great! If my cabinets weren’t falling apart I would totally give painting them a try. It’s amazing what a fresh coat of paint can do.
Hello Dallas!
Thank you so much – I love the finished look of the kitchen cabinet painting project.
Thank you for reading!
I would not have thought I could paint cabinets on my own – thought I would need to pay a pro mucho $$ to have it done. This article just saved me a ton of money!
Hi Stephanie!
This kitchen cabinet painting project is so affordable. I really needed something that wasn’t expensive – so I did tons of research and love the finished cabinets!
Thank you for reading!
Such a detailed post! Pretty helpful. Really fascinating to learn the various steps involved in kitchen cabinet painting. Thank you so much for putting together this amazing guide!
Hi Hari!
I’m excited you found the kitchen cabinet painting post to be helpful. Although there are 18 steps, they go quickly and are very easy to do.
Thank you for reading!
Well done, amazing outcome and great tips! So helpful.
Hi Maria!
Thank you so much for the compliment! I’m excited about the outcome of the kitchen cabinet painting project, too.
Thank you for reading!
Amazing tips and ideas for kitchen cabinet painting! Thank you for sharing such a detailed blog post!
Hi Loshane!
I’m excited you found the kitchen cabinet painting tips and ideas amazing.
Thank you for reading!
Thank you so much for these detailed instructions on kitchen cabinet painting. I hate our dark brown cabinets because there’s not much natural light in the kitchen, and I also live in Washington so it’s dark as it is….so the kitchen is not as bright as I’d like. I think white cabinets would brighten it up at least a little bit. 🙂
Hi Jenna!
I know exactly what you mean about hating dark brown cabinets. When we moved into the house – ours were a dark walnut/cherry. I was so impressed with how well the paint covered the cabinets and with just a few coats of paint.
Thanks for reading!
Saving this for when we start to reno our kitchen! Love all the great and helpful tips!
Hi Brooke!
I hope your future kitchen reno turns out great!
Thank you for reading!
We have played around with this idea for quite sometime now. This post is very helpful to organize thoughts and an actual list of supplies.
Hi Vaishali!
We debated taking the leap into kitchen cabinet painting – but, are so glad we did. I’m glad you found the post helpful.
Thank you for reading!
My kitchen cabinet definitely needs some work. I’m glad I came across this post. I’ll follow the steps you have outlined. Thanks
Hi Fleek!
I hope you are able to update your kitchen cabinet through painting with these 18 easy steps.
Thank you for reading!
The before and after pics are great! The end result looks wonderful. It is nice to have this option when it comes to updating a kitchen.
Hi Marysa!
I’m so glad you liked the before and after pics of the kitchen cabinet painting process. Painting is really a great option on a budget.
Thank you for reading!
I love the kitchen’s new look now. What a difference.
Hi Sonia!
Thank you so much for your kind words on the kitchen cabinet painting project. I really liked the end result, too.
Thank you for reading!
Nnniiccceeee…these are very detailed steps, I must say! I highly appreciate you sharing them with us here. I will need them soon.
Hi Ntensibe!
I hope you are able to use some of the kitchen cabinet painting in 18 easy steps tips soon.
Thank you for reading!
Thank you for these great tips on kitchen cabinet painting. My sister is going to do this but is nervous about the outcome. I’ll share this with her.
Hi Healing Oils!
I hope your sister’s kitchen cabinet painting project goes great!
Thank you for reading and sharing the post with her!
Wow that od an improvent!
Hi Klaudia!
I hope you enjoyed the kitchen cabinet painting post.
Thank you for reading!
I am so grateful for the easy steps. I am getting ready to do my kitchen and this post was a lifesaver!
Great transformation! I love white cabinets!
Great steps. Your steps gave me the confidence I needed to get started. Thank you.
I love it, so many great tips. I have this project coming up this summer, it’ll come very handy. Thanks
This is so helpful! My hubby and I just got a fixer upper so these DIY posts are a godsend!
Very detailed steps. You’ve got my wheels turning…my kitchen looks a lot like your before photo!