
Have you been searching for an easy way to upgrade your old, outdated, and just plain drab kitchen countertop? Then keep reading! I have a simple and budget-friendly DIY countertop upgrade that is perfect for you to update your space quickly.
If you’ve been around Basic Home DIY for a while, you already know one thing about me — I absolutely love a good DIY project.
There’s something so satisfying about taking something outdated and turning it into something fresh and modern without spending a fortune.
And this project is one of my favorite quick transformations to share.
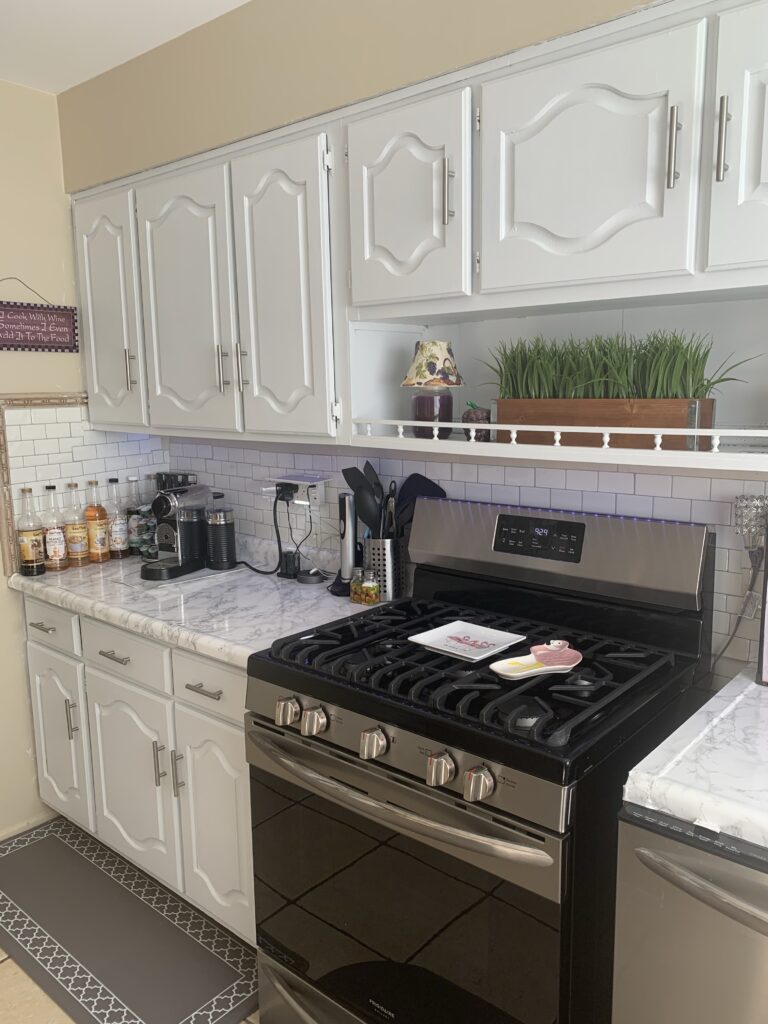
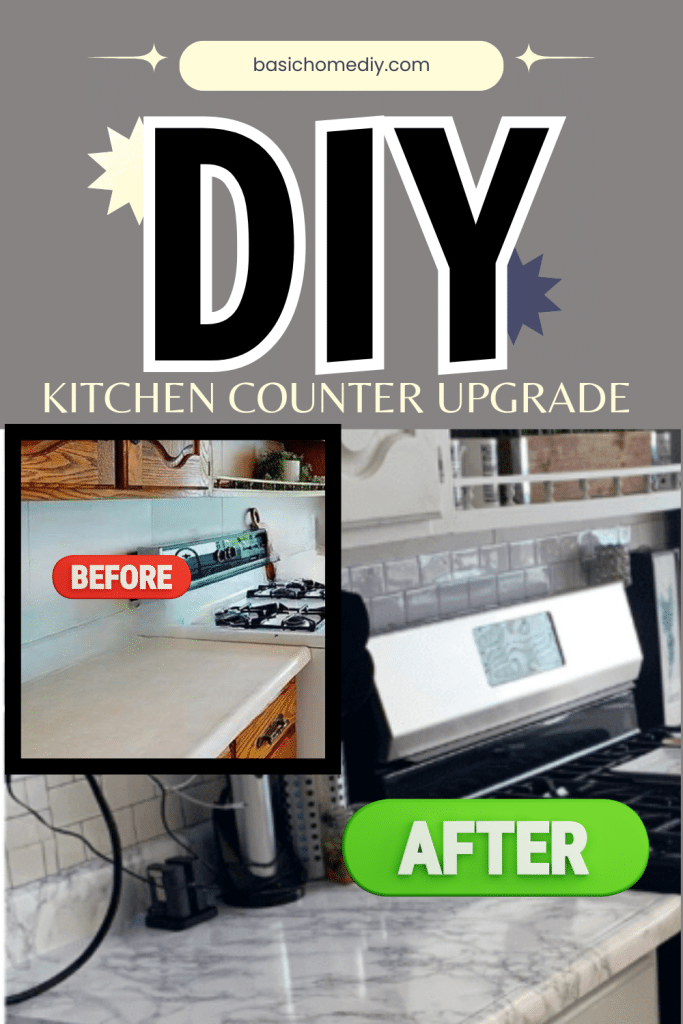
When we moved into our straight-from-the-1960s home, the very first thing that needed attention was the kitchen.
It definitely had potential, but it felt dark, dated, and in serious need of a little love.
After all the moving expenses, our budget was tight, so a full kitchen renovation just wasn’t happening anytime soon.
I started looking for a cheap DIY countertop upgrade that would make a quick and easy change — something that could brighten up the space without completely crushing my wallet.
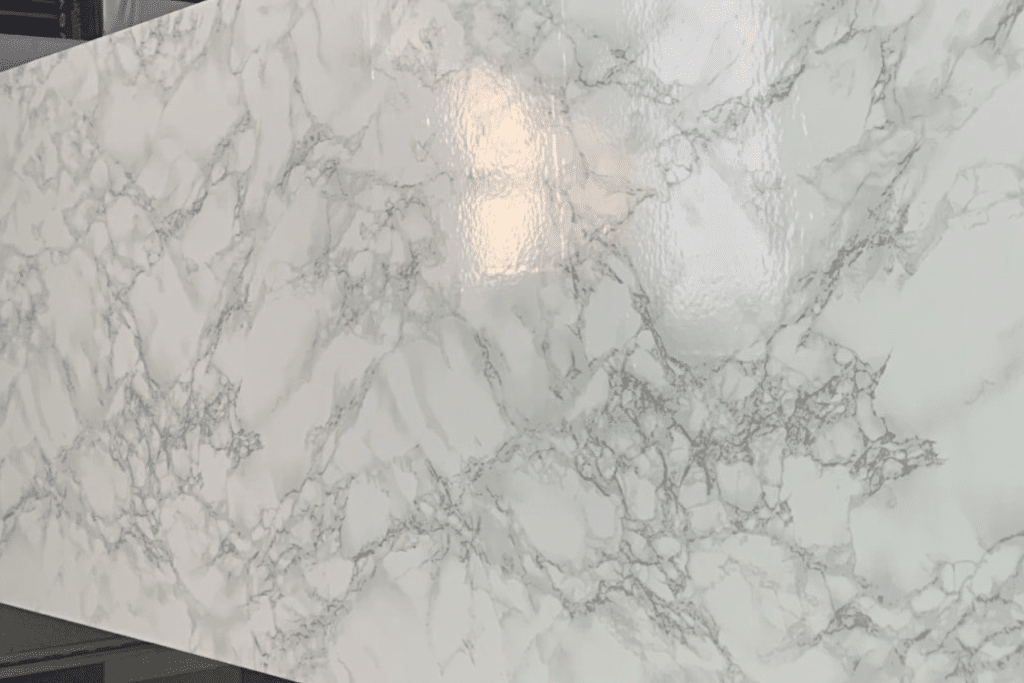
That’s when I discovered how simple it can be to update countertops with contact paper.
It gave us a way to focus on upgrading the kitchen into a brighter, more modern space without the stress (or cost) of replacing everything.
I loved the results so much that I even covered a cash wrap counter for a local business and took step-by-step photos so you can see exactly how the process works.
If you’ve been wanting an easy DIY that makes a big difference, you’re going to love this one.
So, let’s get into it.
How Did My DIY Cheap Countertop Upgrade Begin?
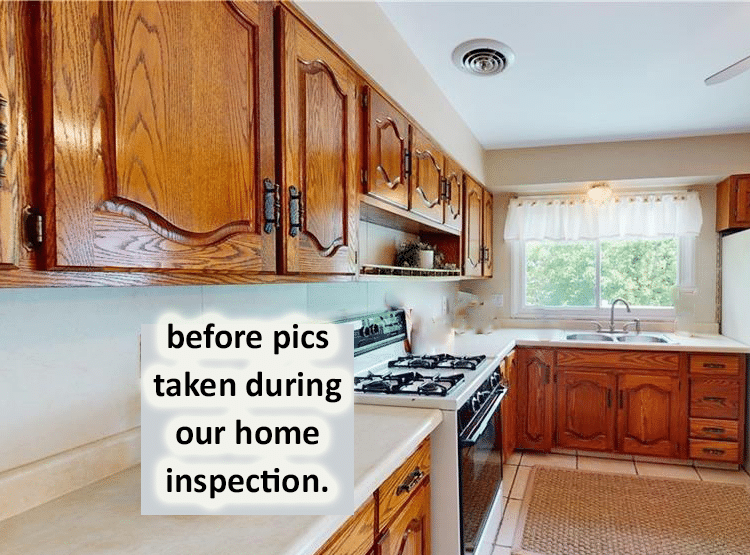
Like I mentioned in the intro, this project really started the moment we moved into our straight-from-the-1960s home.
The kitchen was the very first space that needed attention, and the countertops were one of the biggest things making the room feel dark and dated.
After all the moving expenses, replacing them just wasn’t in the budget, so I knew I needed a cheap and easy way to brighten things up without taking on a full renovation.
So I did what I always do when I need a little inspiration — I headed straight to Pinterest and started searching for easy projects to update a kitchen without spending a lot of money.
After seeing a few ideas, I did a quick search on Amazon to find something affordable that I could try myself, and that’s when my DIY cheap countertop upgrade project officially began.
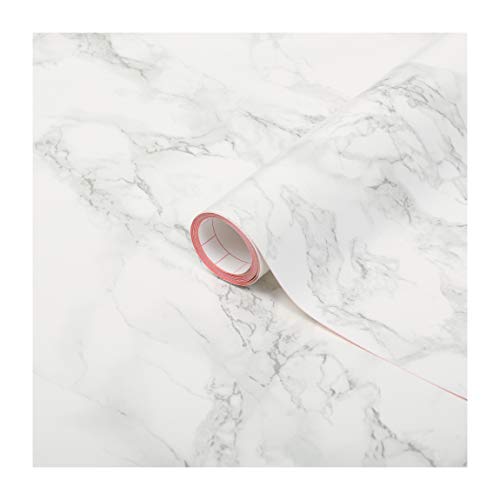
Once I started working with the d-c-fix contact paper, I was honestly surprised at how simple it was to use.
It’s incredibly beginner-friendly and much easier to work with than I expected.
My kitchen went from blah to wow in just a few short, easy steps.
One of the biggest reasons I chose it in the first place was because I needed something waterproof, especially since the countertops are used every day and sit right next to the kitchen sink.
It had to be something that could handle cleaning and normal kitchen use.
What I also love about d-c-fix contact paper is that it’s not just for kitchen countertops.
It works great in bathrooms, on desks, dresser tops, and even workplace counters.
After sharing photos of my own DIY cheap countertop upgrade, I was actually asked to update a cash wrap counter at a local business.
That gave me the perfect chance to document the entire process step-by-step so you can see exactly how easy it is to do this project from start to finish.
Keep reading to see how simple it really is to use d-c-fix self-adhesive peel and stick waterproof contact paper in your own home.
Step 1: Get the Perfect Countertop Measurements First
Before you start anything, the most important first step is getting accurate measurements.
I know it sounds simple, but taking a few extra minutes here will save you a lot of frustration later.
When I started my countertop upgrade, I measured everything more than once just to make sure I had the right amount of contact paper and wouldn’t run short in the middle of the project.
Start by measuring the length and width of each section of your countertop.
Don’t forget smaller areas like the space near the sink, corners, and any shorter side pieces.
It’s also a good idea to add a few extra inches to your measurements, so you have a little room to adjust while applying the contact paper.
That extra bit makes it much easier to line everything up neatly and trim the edges cleanly once it’s in place.
Taking the time to get the measurements right from the beginning makes the entire project go much smoother.
It helps you avoid waste, keeps the process simple, and makes the finished countertop look so much more polished and professional.
Step 2: Grab the Right DIY Kitchen Countertop Upgrade Materials

The next step in your upgrade project is making sure you have the right tools and materials ready before you start.
Trust me, this makes the whole process so much easier and helps everything go a lot smoother from beginning to end.
One of my favorite things to use for this project is a wallpaper smoothing toolkit.
Is it absolutely necessary? No.
But after trying to smooth the contact paper with just my hands and regular scissors, I can honestly say it’s much faster, easier, and way more precise when you have the proper tools.
The smoother helps get rid of bubbles quickly, and the cutting tools make a big difference when you’re trimming around edges and corners.
Here’s everything I used for my DIY countertop upgrade:
- Wallpaper Toolkit
- Multiple sizes of smoothing tools
- Measuring tape
- Craft knife
- Paper cutter
- Hair dryer
- d-c-fix contact paper or contact paper of your choice
- Cleaning agents such as Windex
- Clear Caulk
- Scissors
Step 3: Prepare to Lay the Countertop Paper on the Countertop

Before you start sticking the contact paper down, preparation is key.
This step might seem small, but it makes all the difference in getting a smooth, professional-looking finish.
First, give your countertop a thorough cleaning.
Wipe down the entire surface with a cleaning spray like Windex to remove dust, grease, and any crumbs.
You want a perfectly clean, dry surface so the contact paper sticks properly and stays put over time.

Next, make sure you’ve pre-measured and cut your pieces to roughly the right size.
You don’t have to be perfect yet — you’ll trim the edges after applying — but having pieces ready will make the process go much faster.
If your countertop has edges, corners, or seams, take a moment to plan how you’ll wrap or overlap the paper for a smooth finish.
Some people like to score the paper lightly at the edges before sticking it down to make folding easier.
Once your countertop is clean and prepped, and your pieces are ready, you’re set to start applying the contact paper.
Step 4: Measure the Countertop Area Before Cutting the Paper

Once your countertop is prepped, the next step is to measure the workspace carefully.
In this case, that means your countertop.
Accurate measurements are key to making sure your contact paper fits perfectly and looks smooth once applied.
Before peeling off the backing, cut the contact paper to fit the surface as closely as possible.
This makes the application much easier and helps prevent bubbles or wrinkles.
Trim any excess and save it — you never know when those extra pieces might come in handy later.
For my home project, the countertop was almost the full width of the contact paper roll, so I didn’t need to do much trimming.
But if you’re working with an oddly shaped space, you may need to create two or more side-by-side panels.
Just take your time and measure carefully.
Pro tip: When dealing with unusual shapes, measure repeatedly. It’s always better to double-check than to end up with pieces that don’t fit. Keep any extra scraps handy — I had to piece together a small section on my own countertop update, and having those saved bits made it much easier. Careful measuring here makes the rest of the project go much smoother.
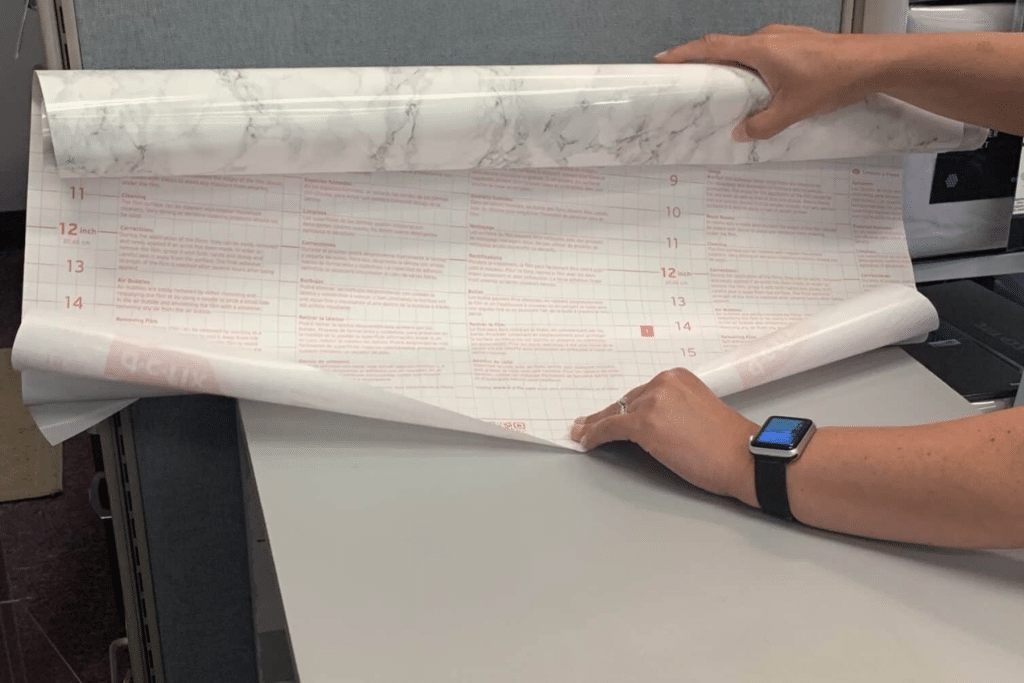
Step 5: Separate the d-c-fix Contact Paper and Start the Process

Now it’s time for the fun part — starting to apply your contact paper!
The most important thing here is to separate the backing slowly and carefully.
Ripping it too quickly can cause tears or make it tricky to line up correctly.
I like to start with one corner, gently peeling back a small section of the backing.
Then I work my way to the middle, and finally to the other end.
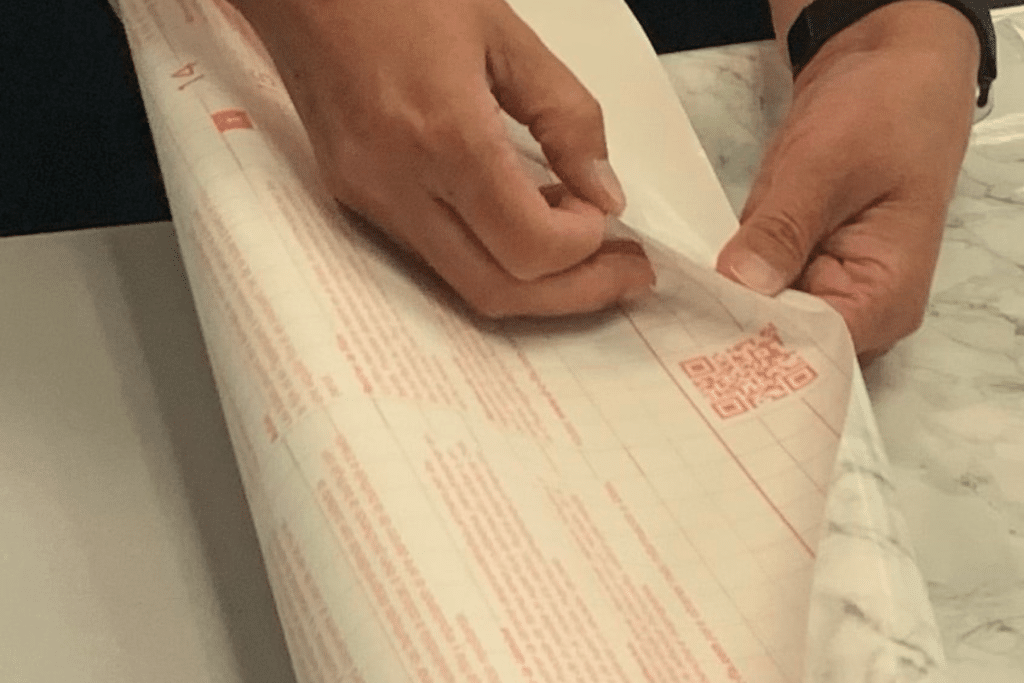
Taking it slow like this gives you more control and makes it easier to smooth the paper onto the countertop without bubbles or wrinkles.
Once you’ve got the first section open and lined up properly, you’re ready to move on to laying down the rest of the paper and smoothing it into place.
This careful start sets the stage for a clean, professional-looking finish.
Step 6: Attach d-c-fix Contact Paper to the Surface Slowly
This step is key to getting a smooth, professional-looking finish.
Start by placing the contact paper evenly along one side of your countertop, just about an inch at first.
Don’t worry if it’s not perfect — you can lift and adjust it as needed.
The paper isn’t too sticky at the beginning, which makes it very forgiving and easy to work with.
Working slowly and patiently at this stage really pays off, and it’s the key to a clean, polished DIY countertop upgrade.
Pro tip: Take extra care to make sure the paper is straight from the very start. If it’s off even slightly, it can throw off the alignment as you work your way across the countertop. While you can pick it up and realign as you go, starting straight makes the process much smoother and helps avoid awkward overlaps or uneven edges later.
Step 7: Smooth d-c-fix Contact Paper Across Countertop

Now that your contact paper is aligned, it’s time to start smoothing it across the countertop.
This is where the transformation really begins!
I’m right-handed, so I usually hold the sticky side in my right hand while carefully applying it to the surface.
At the same time, I use a smoothing tool to press the paper down and work out any air bubbles, while slowly unrolling the adhesive with my left hand.
Pro tip: A smoothing tool is your best friend here. It helps prevent bubbles and keeps the paper flat and even. Work slowly, unrolling the contact paper as you go, smoothing as you move along.
Another pro tip: Pull the backing from the bottom with one hand while using the smoothing tool with the other. This method keeps everything controlled and ensures a clean, polished finish. Taking your time in this step makes a huge difference in the final look.
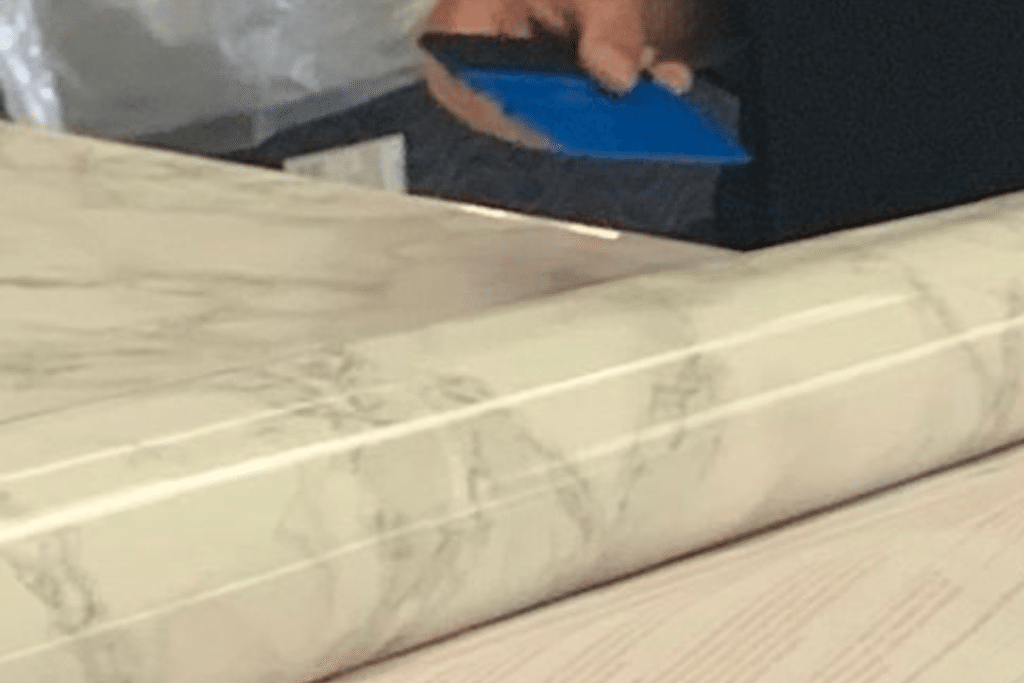
Step 8: Attach d-c-fix Contact Paper with Great Tools

Once the paper is fully applied to the countertop, it’s time to secure the edges and wrap it around any sides or corners.
This is where the right tools really make a difference.
I like using the blue smoothing tool that comes with a soft edge.
It presses the contact paper down firmly without risking tears or damage, which can happen if you try to use something too hard or rigid.
Carefully run the tool along all the edges, making sure everything is smooth and firmly in place.
Using the proper tool here helps your countertop look polished and professional, and it keeps the contact paper snug and secure for everyday use.
Step 9: Cut Excess Contact Paper

Now it’s time to make the contact paper fit your countertop perfectly by trimming away any excess.
Using a craft knife, scissors, or another precise cutting tool, carefully follow the edges for a clean, polished look.
Take your time and go slowly — rushing here can result in uneven edges or accidental tears, which can be frustrating to fix.
When you reach corners or edges, make small slits in the paper and gently fold one end over the other to help it wrap around neatly.
Don’t worry if it doesn’t sit perfectly at first; you’ll smooth and adjust these areas in the next step.
This approach makes it much easier to get crisp corners and a professional-looking finish without stressing over perfection on the first try.
Step 10: Smooth the d-c-fix Contact Paper Edges Under Countertop
Now it’s time to secure the contact paper along the edges and under the countertop.
This step is important because it helps the paper stay firmly in place over time and prevents it from peeling up with regular use.
Use your smoothing tool to press the paper down along the edges, creating crisp, defined lines.
These firm edges not only make the countertop look polished, but they also make trimming and finishing the corners much easier in the next steps.
Taking a little extra time here ensures your DIY countertop upgrade stays neat, smooth, and durable for the long haul.
Step 11: Heat Up the Area to Adhere d-c-fix Contact Paper to Countertop

To make this next step as quick and easy as possible, I like to use a hair dryer.
It’s the perfect way to help the contact paper adhere to the countertop — warm enough to secure it for long-lasting use, but not so hot that it damages the paper.
I set the hair dryer on low to medium heat and slowly move it across the surface while using the yellow plastic smoothing tool from the kit to press the edges down.
Take your time with this step.
Going slowly ensures that more of the surface gets properly affixed and helps avoid bubbles or wrinkles.
Don’t hold the heat in one spot for too long, as this can cause the paper to bubble, melt, or deform.
You can use your hand to smooth areas as you go, just be mindful of the heat from the hair dryer.
Patience here really pays off — the more careful you are, the cleaner and more professional your finished countertop will look.
Step 12: Trim and Clean Contact Paper from the Countertop

Now it’s time to trim any excess contact paper and give your countertop a clean, polished look.
A craft knife is the best tool for this step because it allows for precise, controlled cuts.
I like to hold it like a pencil, which makes it easier to follow the edges and curves without slipping.
Remember those hard lines we created along the edges in Step 10?
Use them as your guide — they make it simple to see exactly where to trim.
Take your time and go slowly, cutting small sections at a time.
This careful approach ensures crisp, clean edges and gives your DIY countertop upgrade a professional, finished appearance.
Step 13: Turn up the Heat Again on This DIY cheap Countertop Upgrade
For a long-lasting finish, it’s important to make sure the contact paper is fully adhered to the countertop.
I like to go over all the edges again with a hair dryer, paying extra attention to corners and tricky spots.
The corners are especially important — this is where we made the small slits and folded the paper over each side.
Applying a bit of heat here helps secure those folds, bonding the edges together and creating a strong, smooth finish that won’t peel over time.
Taking this extra step ensures your DIY countertop upgrade stays neat, polished, and durable for everyday use.
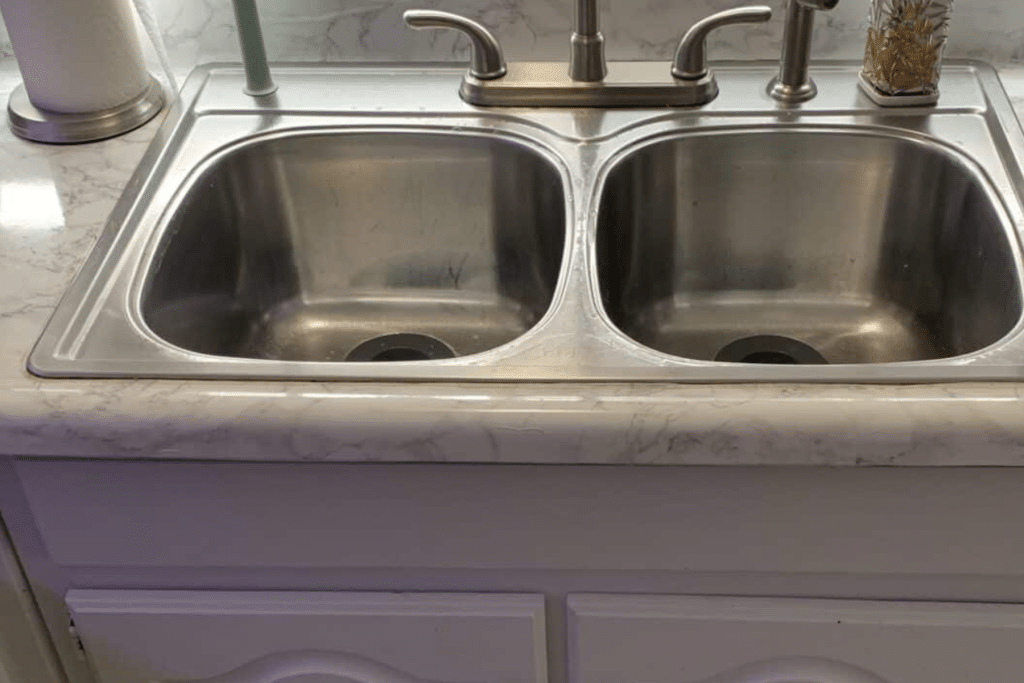
Step 14: DIY Cheap Countertop Upgrade Around the Kitchen Sinks
Whew — we’re almost there!
The last step is all about the tricky areas around the kitchen sink.
While I didn’t include this in my d-c-fix contact paper cash wrap countertop tutorial, it was an essential step for my home kitchen upgrade.
Start by using your smoothing tool to create crisp, hard lines around the sink.
Then, carefully trim the contact paper with a craft knife, being extra cautious not to cut into the sink itself — precision is key here!
Pro tip: Once everything is trimmed and in place, use clear caulk along the edges to protect against moisture. This helps prevent water from getting under the paper and keeps your DIY countertop looking clean and polished for years to come. Taking the time on this final step really pays off!
Final Thoughts
If you’ve been putting off updating your countertops because it feels too expensive or overwhelming, I truly hope this project shows you that a simple change can make a big difference.
This was one of those quick DIY upgrades that helped us turn our dated 1960s kitchen into a space that felt brighter, cleaner, and so much more modern without spending a lot of money.
What I love most about using contact paper is how easy and beginner-friendly it really is.
You don’t need expensive tools, a huge budget, or a full weekend to make it happen.
It’s a great option if you’re working with a tight budget after moving, updating a rental, or just looking for a fast way to refresh your kitchen without committing to a full renovation.
And if I could take something as outdated as our original countertops and give them a fresh new look, you absolutely can too.
Sometimes the smallest DIY projects end up making the biggest impact.
Want more great DIY and everything home ideas? Be sure to follow us on Flipboard, Pinterest, Instagram, Facebook, and X for the latest posts, tips, and ideas.
Your Turn
Have you ever tried a cheap countertop upgrade project with contact paper? Do you have any tips to share? Would you try this kitchen upgrade in your home? Let me know in the comments below!
RELATED POST:
- Repaint Kitchen Table and Chairs the Easy Way with These 12 Steps
- Easy Steps to Kitchen Cabinet Painting
- Cheap and Easy Kitchen Updates On a Budget That Make a Big Difference for Less
- Cheap and Easy Kitchen Updates On a Budget That Make a Big Difference for Less
- Upgrade Your Kitchen on a Budget
- Install a Kitchen Peel-and-Stick Backsplash on a Budget
- Easy Kitchen Remodel Ideas on a Budget
- 20 Kitchen Decorating Theme Ideas for Every Home


Wow, this project turned out AMAZING! I would never have guessed it was done with Contact Paper – that stuff is fantastic for beginners to work with.
Hi Jen! Thank you so much! I couldn’t believe it was only contact paper, too. Thank you for reading!
So impressive and creative! I have been finding new uses for contact paper and this is one I have not tried! Thank you for sharing!
Hi Lindsey!
I’m glad you found new ideas for contact paper – it’s amazing how much it can do!
Thank you for reading!
Thank you for the excellent instructions. I have a basement bathroom that needs lots of love.
Hi Stephanie!
I hope you are able to upgrade your basement bathroom. The contact paper is so easy to work with!
Thank you for reading!
It looks incredible! Thank you for putting together such a thorough and informative guide!
Great post!
I’m in need of an kitchen upgrade. Thank you for sharing.
Really neat to now know about a cheap countertop idea. This is great for my high need for novelty to know there are cheap ways to upgrade the looks. Thank you for sharing!
Hi Nia!
I’m excited you enjoyed the DIY cheap countertop upgrade post. I was amazed at how cheap it was to redo the countertops and was so excited to share the project.
Thank you for reading!
Not planning any projects anytime soon but…wow. this looks amazing!!!
Hi Vaishali!
Thank you for the kind words on my DIY cheap countertop upgrade project. I really appreciate it!
Thank you for reading!
Very thorough! Your countertops turned out great!!
Hi Katie!
Thank you for the kind words on the countertops. I hope you enjoyed the DIY cheap countertop upgrade post.
Thank you for reading!
We do this method a lot of times before and it’s good that you shared it. Because it’s really good.
Hi Fransic!
It’s amazing what a diy cheap countertop upgrade can do for a kitchen. We love how ours turned out and sounds like you’ve had great success, too!
Thanks for reading!
This is the best thing I have buy ever!!!!! It’s amazing how my kitchen look and feel after we changed it with the countertop contact paper. I love this product!
Hi Yzzy!
I’m so excited you had a good experience with DIY countertop upgrade ideas. I love my countertops, too!
Thanks for reading!
These are very doable steps and I love how it turned out!
Hi Sarah!
With a little trial and error, the d c fix paper is wonderful. I was really excited about how it turned out, too.
Thanks for reading!
Wow! I never would have guessed from the photos that you covered your counters with contact paper. Nicely done! Thank you for sharing your ideas.
Hi Lisa!
Thank you for the compliment on the countertop upgrade. I was really excited on how it turned out and loved using the d c fix paper.
Thanks for reading!
Thanks for this helpful post! I love these 14 easy steps to DIY a cheap countertop upgrade. Your instructions with the photos are very helpful. Thanks for sharing.
Hi Hadassah!
I’m excited you found the DIY cheap countertop upgrade post helpful and the instruction were good.
Thank you for reading!
This is such a great idea for a countertop upgrade! I love it. Thanks for sharing
Hi Charity!
I’m excited you love the cheap countertop upgrade ideas.
Thanks for reading!
Rich info on countertop upgrade. Thanks
Hi Chims!
I’m glad you enjoyed the DIY countertop upgrade project.
Thank you for reading!
Thank you for the steps. This really spices up the look of kitchens, and I’m lovinnn it.
Hi Tweenselmom!
I’m so glad you liked the DIY countertop upgrade project and found the steps helpful.
Thank you for reading!
This is great! I’ve honestly been debating about upgrading the kitchen in my house since the day I moved in. While it’s not a priority right now, this post gave be a dose of inspection for the further! Thank you so much for sharing!
Hi Whitney!
You are very welcome! I hope you are able to upgrade your kitchen when the time comes.
Thank you for reading!
Wow, that was an amazing transformation! Your instructions are also perfection.
Hi Vanessa!
I’m so excited you found the DIY countertop upgrade instructions perfect. Also, thank you for the kind words on the kitchen transformation.
Thank you for reading!
Wow! Your counters look amazing! They turned out really good!
Hi Kelly!
Thank you for the kind words. I was excited about how the DIY countertop upgrade project worked out.
Thank you for reading!
How exciting that your photos earned you a request from a business! I’ve seen how to marbleize a countertop with paint kits, but this is the first time I’ve seen it done with contact paper. What a great result!
Hi Julie!
Thank you for the kind words. I was excited about how the projects both came out. I’ve also seen the paint kits – they look awesome, too.
Thank you for reading!
I love the faux contact paper & faux tiles they sell now. I used some on the back splash in my kitchen and it made a huge difference in how it looks.
Hi Luna!
I also did a kitchen backsplash project, too. I love that there are so many new and exciting products on the market for an easy DIY project.
Thank you for reading!
I love the end results. I would love an upgrade to my kitchen too and this does not cost so much money.
Hi Beth!
I’m excited you love the end results of the DIY countertop upgrade project. It really is an easy and budget-friendly option.
Thank you for reading!
This turned out so good! My counters are old and gross, but we can’t afford to pay to get the kitchen redone. I need to try this!
Hi Patricia!
You should really try using the contact paper for a kitchen reno. It’s easy to work with and very budget-friendly.
Thank you for reading!
It was interesting to see how you did that. I’ve not come across the contact paper before. It seems quite easy to use. Funny you should say that about the iron. I won’t iron either. I’m scared of ours so the husband has to do it well away from me.
Hi Melanie!
I am definitely not a fan of hot things! The hair dryer is the perfect option for adhering to the contact paper for me! LOL!
Thank you for reading!
I love your idea. Our kitchen is pretty old and needs some refreshments. I`ll show your article to my husband because he is handier.
Wow! The end result is perfect! This is a really nice idea I love it!
Hi Rose Ann!
Thank you for the kind words. I love the end result of the DIY countertop upgrade project, too.
Thank you for reading!
Hi Olga!
The DIY countertop upgrade project is super easy. I know both you and your husband could give it a try. It really makes for a cheap and easy project.
Thank you for reading!
I really appreciate the time and effort you took to walk us through the process.
Hi Sonia!
You are very welcome. It was my pleasure to showcase how easy the DIY countertop upgrade project is to complete.
Thank you for reading!
This actually looks good. You definitely did a great DIY job. We are also planning to upgrade our kitchen and we’ll definitely consider using contact paper since it’s more budget-friendly. Thank you for sharing this wonderful idea. Appreciate the tips and guide.
Hi Clarice!
You are very welcome. I hope your kitchen upgrade project goes well.
Thank you for reading!
Nnnniiiccceeeee….thank you for sharing these tips! The kitchen top here is way over-due, to be honest!
Hi Ntensibe!
I hope you are able to give your kitchen countertops a refresh when the time comes.
Thank you for reading!
WE are about to remodel a kitchen! This is so helpful!
Hi Neely!
I love a good DIY kitchen remodel project, too. I’m glad you found the post helpful.
Thank you for reading!
This actually looks really good. I could really use something like this because my kitchen countertop actually needs an upgrade and an inexpensive one at that.
Hi Christiana!
This is such an easy project to accomplish. I hope you are able to refresh you countertops when the time comes.
Thank you for reading!
I have a lot of respect for people who are good with Diy as I’m not good at all. Your counter tops are really good.
Hi Monidipa!
Thank you for the kind words on the DIY countertop upgrade project.
Thank you for reading!
Had to come back for a second look. I like how easy and non messy the application of the paper is. Because my time spend at home varies from week to week, any design process can’t take more then a day or two to complete. Thankfully this checks off all of those boxes! Thanks again!
Wow, blown away! This is such a great idea for a rental unit as well.
Thanks for this easy guide on doing a countertop upgrade. Using this guide will make it very easy for me to upgrade my countertop now.
I’m so glad you found the countertop upgrade guide helpful. I hope you’re able to try the DIY project soon! Thanks for reading!
is yours still holding up to water?
Hi Robin!
Yes, it’s been a few years and my home countertop is still holding up with water and does great with frequent cleanings. I still love the product!
Thank you for reading!
Hi Robin!
Yes, it’s been a few years and my home countertop is still holding up with water and does great with frequent cleanings. I still love the product!
Thank you for reading!
Love this idea! We’re currently shopping for our first house and we’re looking at older homes. So this will be really helpful!
Wow. Contact paper. I’ve heard of people doing this. You walked thru the steps and showed your experience. Love this. Sharing with my daughter in law.
Thanks.
Hi Mary Ann!
Yes, I didn’t believe how easy the contact paper counter upgrade project was until I tried it. I hope your daughter-in-law in able to upgrade her countertops, too!
Thanks for reading!
Debbie